
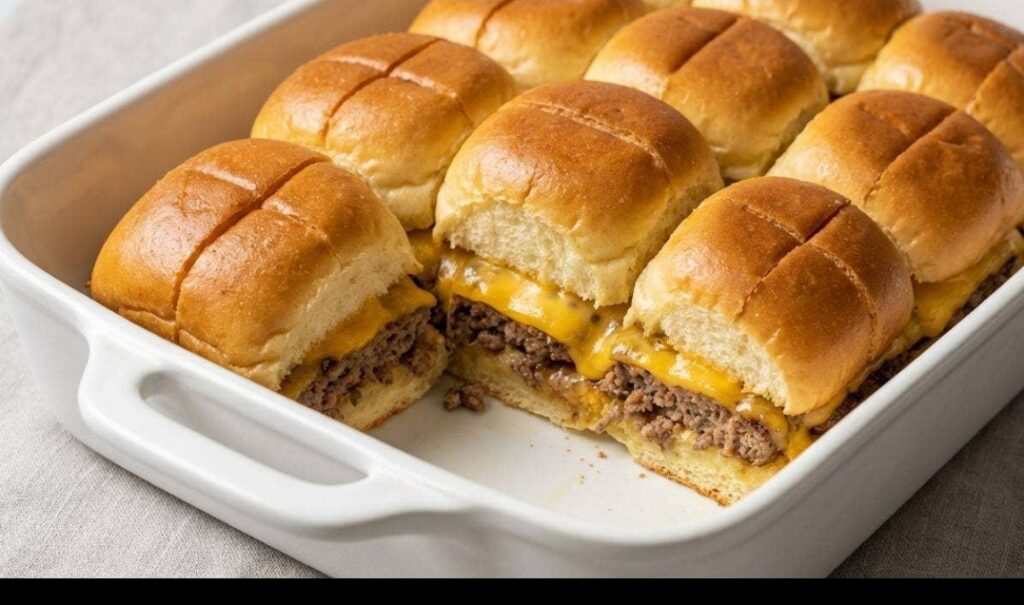
Easy Cheeseburger Sliders
Introduction
These easy cheeseburger sliders are the ultimate crowd-pleasing comfort food. Made with seasoned ground beef, melted cheddar cheese, and soft, buttery slider buns, they are baked together in one dish for a simple meal that is perfect for busy weeknights, game days, parties, potlucks, and family gatherings. Instead of forming and cooking individual burgers, the beef is prepared as one layer, topped with plenty of cheese, and tucked beneath golden Hawaiian-style rolls. The result is a batch of warm, juicy mini burgers with crisp, toasted edges and gooey cheese in every bite. Serve them fresh from the oven with pickles, ketchup, mustard, or your favorite burger sauce for an easy dinner everyone will want seconds of.
Why I Love It
I love this recipe because it delivers all the flavors of a classic cheeseburger without the extra work of cooking individual patties. Everything comes together in one baking dish, making preparation and cleanup wonderfully simple. The soft rolls become lightly toasted on top while the bottoms soak up the savory flavor from the beef and buttery topping. Melted cheddar adds richness, while a little seasoning keeps the beef flavorful without overpowering it. These sliders are also incredibly versatile. They can be served as a quick family dinner, an easy party appetizer, or a game-day snack. They are warm, cheesy, satisfying, and wonderfully easy to customize.
What Makes It Special
The magic of these cheeseburger sliders is the way the ingredients bake together. The beef forms a hearty layer underneath the buns, while the cheddar melts into a creamy blanket that holds everything together. Baking the sliders as one large sandwich makes them easier to prepare than traditional burgers and helps keep every bite moist and flavorful. Brushing the tops with melted butter before baking gives the rolls a beautiful golden finish and adds a delicious buttery flavor. You can keep the recipe classic or add diced onions, pickles, bacon, jalapeños, or a special burger sauce to create your own version.
How to Make
Ingredients
- 1 pound ground beef, preferably 80/20 for juicy sliders
- 12 slider buns or Hawaiian-style dinner rolls
- 8 ounces cheddar cheese slices
- 1 tablespoon olive oil
- 1 teaspoon garlic powder
- 1 teaspoon onion powder
- 1 teaspoon Worcestershire sauce
- 1/2 teaspoon smoked paprika
- 1/2 teaspoon salt
- 1/4 teaspoon black pepper
- 2 tablespoons butter, melted
- 1 teaspoon sesame seeds, optional
- 1/4 cup finely diced onion, optional
- Pickles, ketchup, mustard, or burger sauce for serving
Instructions
- Preheat the oven to 375°F (190°C). Lightly grease a 9 x 13-inch baking dish or another appropriately sized oven-safe dish.
- Heat the olive oil in a large skillet over medium heat. Add the ground beef and break it apart with a spatula as it cooks.
- Add the diced onion if using. Cook the beef until browned and fully cooked, stirring frequently so the meat cooks evenly.
- Drain excess grease from the skillet if necessary. Return the beef to the pan and stir in the garlic powder, onion powder, smoked paprika, salt, black pepper, and Worcestershire sauce.
- Cook for another 1 to 2 minutes, allowing the seasonings to coat the beef. Remove the skillet from the heat.
- Without separating the individual rolls, carefully slice the entire package of slider buns horizontally. Keep the tops and bottoms intact as much as possible.
- Place the bottom half of the rolls into the prepared baking dish. Spread the cooked seasoned beef evenly over the buns.
- Arrange the cheddar cheese evenly over the beef. Make sure the cheese reaches close to the edges so every slider gets plenty of melted cheese.
- Place the top half of the rolls over the cheese and beef layer.
- Brush the tops of the buns generously with melted butter. Sprinkle sesame seeds over the top if desired.
- Cover the baking dish loosely with aluminum foil. Bake for about 10 minutes to warm the sliders and melt the cheese.
- Remove the foil and continue baking for another 5 to 8 minutes, or until the tops are golden brown and the cheese is completely melted.
- Remove the sliders from the oven and let them rest for about 5 minutes. This makes them easier to cut and serve.
- Use a sharp knife to separate the sliders. Serve warm with ketchup, mustard, pickles, burger sauce, or your favorite toppings.
Time & Temperature Maintaining
Bake the cheeseburger sliders at 375°F (190°C). The initial covered baking time helps heat the sandwiches evenly and encourages the cheese to melt without browning the buns too quickly. Removing the foil for the final few minutes allows the tops to become beautifully golden and slightly crisp. The total baking time is usually 15 to 18 minutes, although ovens and baking dishes can vary. For food safety, the ground beef should reach an internal temperature of 160°F (71°C) before serving. If preparing the sliders ahead of time from refrigerated ingredients, they may need a few additional minutes in the oven.
FAQ
Can I use a different type of ground meat?
Yes. Ground turkey, chicken, or pork can be used instead of ground beef. The flavor and texture will change slightly, so adjust the seasonings to suit the meat.
What cheese is best for cheeseburger sliders?
Cheddar is an excellent choice because it melts well and provides classic cheeseburger flavor. American cheese, Monterey Jack, Colby Jack, or provolone can also work beautifully.
Can I add onions?
Absolutely. Finely diced onions can be cooked with the beef for extra flavor. You can also use caramelized onions for a sweeter, richer variation.
Can I make these sliders ahead of time?
Yes. Assemble the sliders ahead of time, cover them tightly, and refrigerate them until you are ready to bake. Allow a little extra baking time if they are going directly from the refrigerator to the oven.
Can I use regular dinner rolls?
Yes. Any soft dinner rolls or small slider buns can be used. Hawaiian-style rolls add a slightly sweet flavor that pairs especially well with the savory beef and cheddar.
How do I store leftovers?
Store leftover sliders in an airtight container or tightly wrapped in the refrigerator for up to 3 days. Reheat them in the oven or air fryer for the best texture.
Can I freeze cheeseburger sliders?
Yes. Wrap cooled sliders individually or as a group in freezer-safe wrapping and freeze for up to 2 months. Thaw in the refrigerator before reheating for the best results.
What can I serve with these sliders?
Serve them with French fries, sweet potato fries, potato wedges, coleslaw, a green salad, roasted vegetables, or crispy pickles. They also make a fantastic party appetizer alongside other finger foods.
Why should I cover the sliders while baking?
Covering the sliders helps prevent the buns from becoming too dark before the cheese melts. Removing the foil near the end gives the tops enough time to become golden and lightly crisp.
How do I keep the sliders from becoming soggy?
Drain excess grease from the cooked beef before assembling the sliders. Avoid adding overly wet toppings before baking. Pickles, sauces, and other toppings can be added just before serving.
Final Thoughts
These easy cheeseburger sliders turn simple ingredients into a warm, cheesy, satisfying meal with very little effort. The seasoned beef, melted cheddar, soft rolls, and buttery golden tops create the perfect combination of savory, creamy, and slightly sweet flavors. They are especially handy when you need an easy recipe for a crowd because the entire batch can be prepared and baked together. Add your favorite burger toppings to make them your own, or keep them simple for a classic cheeseburger experience. Whether served for dinner, a party, or game day, these sliders are the kind of recipe that disappears quickly from the baking dish.